

I like to call these miniature cakes, Queen Victoria Crowns as they look like a royal crown when baked and decorated with a sprinkle of icing sugar.
They are ultimately a scaled down version of the classic victoria sponge cake.
(You can read all about the history of these delicious creamy cakes in THIS POST)
This afternoon I am treating my friends to a crown or two.
Shhhh don’t tell anybody but I cheated a little to save time and bought a Victoria sponge mix.
It saves a lot of time if you need to whip these up in a hurry and doesn’t leave you with lots of baking ingredients that you aren’t likely to use up again.
If unlike me you are being a good baker and not cheating, for your sponge mix, you will need:
– 2 large free range eggs
– 4oz self raising flour
-4oz caster sugar
-4oz salted butter
(1/2tablespoon of baking powder if using a food processor to mix it all up)
-1tsp vanilla extract.
If you are naughty and cheating like me you will need:
-A Victoria Sponge ready made mix
-120ml of milk
– 2 eggs
– 100g of Unsalted butter to get your sponge mix going!
You will also need:
– Small tin cans (preferably the ones you get sweetcorn in)
The number of cans you need depends on how many cakes you want to make in one batch.
– Tinfoil to wrap around the bottom of the tin.
(Step 1)
Prepare your sponge mix first.
If you’re making your sponge by hand, you will need to: Cream your butter and sugar together in a bowl until pale and fluffy.
Beat in the eggs, one at a time, and stir in your vanilla extract. Then fold in the flour using a large (metal) spoon. (Note: no extra baking powder.) If you’re using a food processor, Pop your butter, flour, sugar, eggs, vanilla & baking powder into your blitzer. Make sure the ‘stopper’ is removed, so the air can get in. Turn it on and blend until you have a smooth batter.
Or if like me you are following the instructions from your pre made mix.


(Step 2)
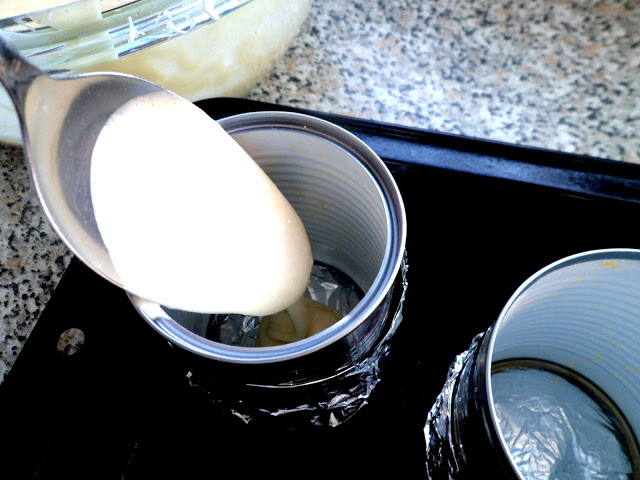
Using a tin opener take off the bottoms of your cans and wrap in tinfoil.

(Step 3)
Spoon a little under half of the sponge mixture into your tin cans.

(Step 4)
Pop into a preheaded oven at around 175-180c.
Once your tins are in do not open the door for 15 minutes as your sponge will drop.
After 15 minutes, open the door and pop a skewer through the middle of the cake.
If the skewer comes out clean and not sticky you are ready to let them cool, if not pop them back in the oven for another five minutes or so.
While your cakes are cooling
It’s onto making the buttercream filling..
It is best to make buttercream if you are not going to be digging into your cakes on the day you baked them as buttercream lasts longer than fresh double cream.
(Step 5)
Mix 100g of unsalted butter along with your icing mix.


(Step 6)
Once your little cakes are cool, take off the tinfoil and use a knife to cut around the bottoms to get your little cake out.


They can be a little tall so trim a small amount from the bottoms and then cut the buns in half.

Now for the decorating fun!
(Step 7)
Add your buttercream to one side and any jam of your choice to the other side and sandwich them together!
And finally, dust with icing sugar!

What do you think?
What occasion would you bake these for?
By Hollie Bradbury

This is such a cute idea!
Thankyou so much 🙂 You should give them a go!
This looks lovely! 🙂
Thankyou 🙂